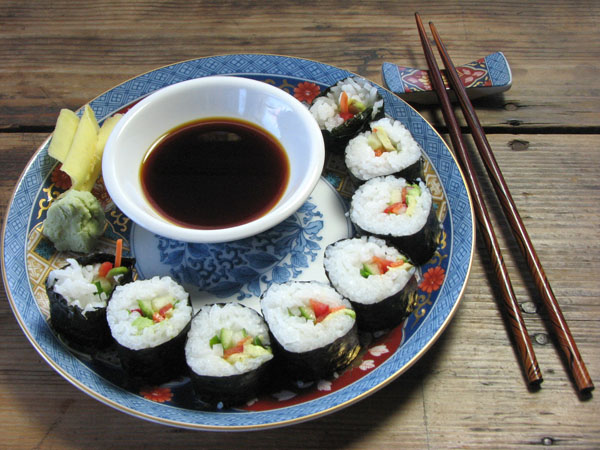
This is week 15 of Reddit’s 52 Weeks Of Cooking challenge. The theme this week is knife skills. When it comes to knife skills, I am just plum lucky I don’t chop fingers off every time I use one. With that said, I was going to do deviled eggs this week. Instead of a straight cut hard boiled egg white, I was going to do a fancy zig zag using a paring knife. Someone in my family(cough cough) thought that was a little lame. When I really thought about it, I agreed, and decided to create something not lame instead. I am dedicating this Vegetarian Sushi post to my darling husband, who inspires me every day.
This plate, chopsticks and chopstick holder is part of a set of two and was a gift from our dear Aunt Sue and Uncle Ben Barnes. Sue and Ben, thank you again for giving us these wonderful date night dishes.
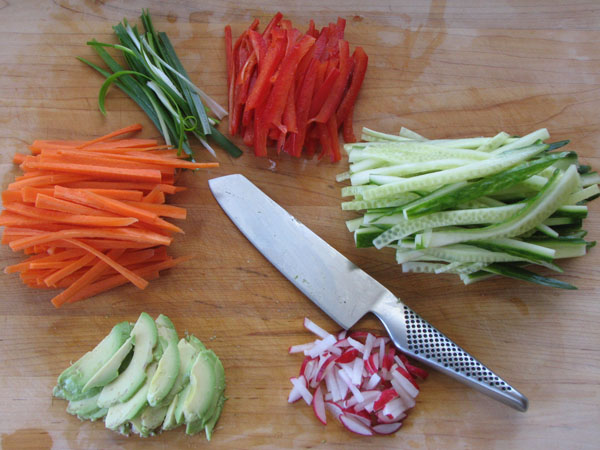
I did not lose a finger slicing these veggies, in case anyone was wondering.
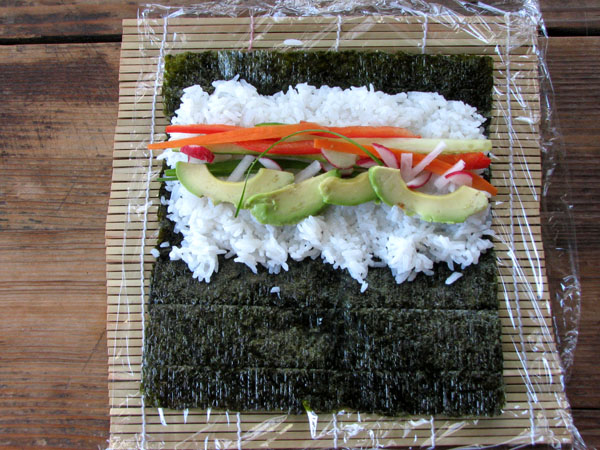
Have a small bowl of water, and vinegar handy, so you can wet your fingers for easy rice handling, and spreading rice. My rice was not as thin a layer as I would have liked, but with practice I will get there. When you are rolling sushi, flip the image above, and have the rice portion closest to your body, and roll away from yourself, as the photograph below shows.
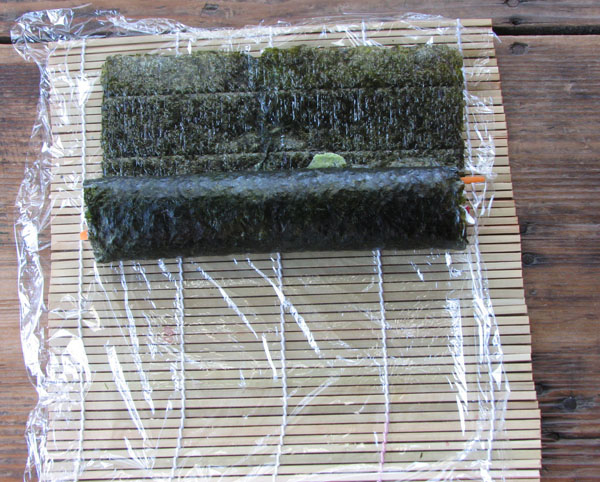
I did not show it but you are going to use the plastic wrap and the bamboo sushi roller to help you roll the sushi.
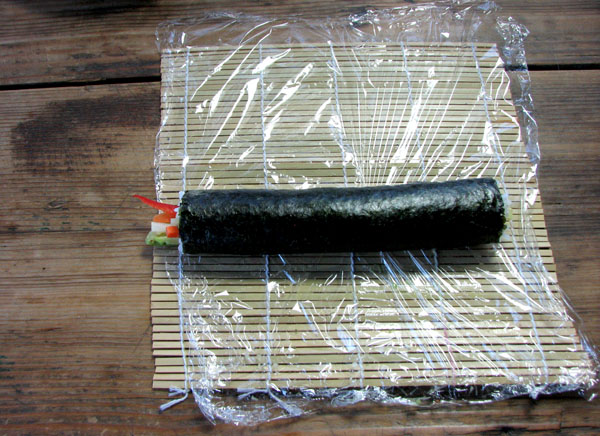
Slightly wet the nori wrap as you roll the sushi, so the nori wrap rolls tightly into itself. Don’t forget to flatten out the plastic wrap so it is ready to use for the next roll.
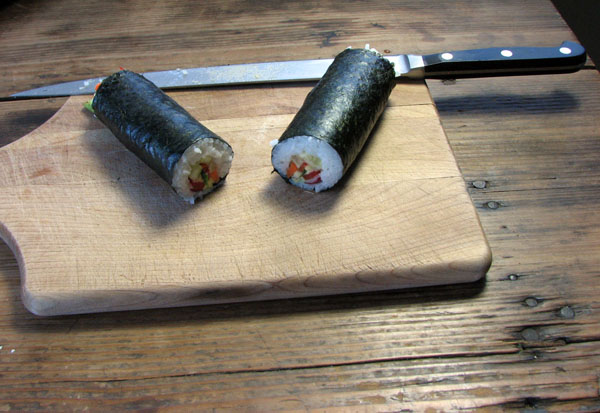
Cut the tight sushi roll in half with a sharp, clean, slightly wet knife. The knife will slice more easily through the roll if it is wet and clean.
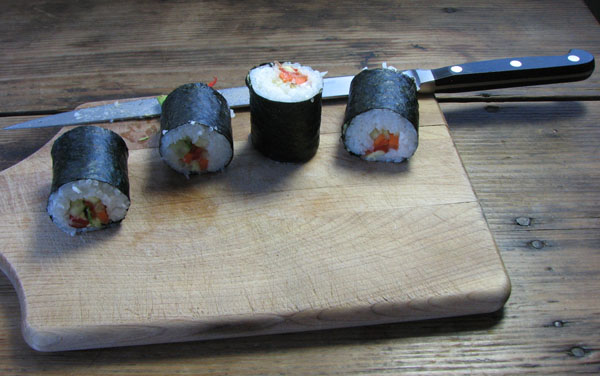
Cut those halves in half to make four pieces. Half these four pieces of sushi again, and you will have eight bite sized pieces as shown in the first picture.
I thinly sliced ginger with the grain, and pickled it in red wine, a pinch of sugar, and seasoned rice wine vinegar for two hours. It was very fibrous, and really sharp and spicy, and not completely edible. Next time I will use a mandolin and slice the ginger against the grain and pickle it for at least 24 hours if not longer.
I hope I have inspired you to practice your knife skills. Please make and enjoy this vegetarian sushi with your family and friends.
- 1 package of Sushi Nori seaweed wrappers (10 wrappers)
- 2 medium carrots, thinly sliced into long strips
- 2 green onions sliced thinly into long strips
- 1 large English cucumber, thinly sliced into long strips
- 1 large red bell pepper, cored and seeded and thinly sliced into long strips
- large avocado, thinly sliced
- 4 large red radishes, thinly sliced
- Tamari, soy sauce, Bragg Aminos, or coconut aminos (optional)
- Wasabli power or paste (optional)
- Pickled ginger (optional)
- SUSHI RICE
- 3 cups uncooked glutinous white rice (I used Jasmine Rice)
- Place hand flat on top of rice
- Fill water til it just covers hand
- 1/2 cup rice vinegar
- 1/4 cup white sugar
- 1 teaspoon salt
- bowl full of 1 cup warm water and 1 Tbsp rice wine vinegar (for dipping fingers in)
- SUSHI RICE
- Measure rice and place in inner cooking pan of rice cooker
- Place correct amount of water per rice in exterior pan
- Rinse the rice under cool tap water until water runs clear
- Place hand flat on top of rice
- Fill water til it just covers hand
- While the rice is cooking, make sweet vinegar to pour over cooked rice
- Stir the rice vinegar, sugar and salt in a small bowl until the sugar dissolves
- Set aside sweet vinegar mixture
- When rice completes cooking, place the rice into a large, wide, shallow non metal dish (vinegar may react with metal)
- Pour the sweet vinegar mixture evenly over the rice and mix/cut in using a spatula
- The sweet vinegar seasoning must be mixed while the rice is hot
- ROLLING SUSHI
- Place a piece of plastic wrap on your sushi mat
- Place a sheet of nori on your plastic wrap
- Sheets of nori have a rough side and a smooth side
- Place the nori so that the rough side is facing up
- With slightly wet fingers, pick up a handful of sushi rice
- Spread the handful of sushi rice on top of the nori
- The rice should evenly cover from 1 inch to the near edge to about 3/4 of the way to the far edge of the sheet
- Start by placing the ball in the middle of the sheet of nori, and spread it out evenly
- Use your fingers to spread the rice onto the nori
- Keep your hands wet with a mixture of water and rice vinegar
- Do not press or mash the rice, or it will not stick properly when rolling
- Place your ingredients in a line, starting on the near edge of the rice layer
- Each ingredient should be in its own line
- I used carrots, cucumbers, green onions, red pepper, radishes, and avocado
- Hold the edge of the mat with your thumbs
- Start with the edge that has your first ingredient next to it
- Lift the nori and fold it over the first ingredient
- Make sure to keep the ingredients in place and that the rice sticks together
- Tighten the roll
- You will need to tighten the roll to keep ingredients from falling out when you cut it
- Remember to tighten the roll with your sushi mat often, but not too tightly
- Roll the sushi roll back and forth in the mat to tighten and seal it
- Allow the roll to sit for a minute before cutting it
- You can use this time to make your next roll
- This waiting period allows the nori to slightly moisten from the rice, which makes it less likely to tear
- Cut the roll into eight pieces using a sharp, wet knife
- Serve with wasabi and pickled ginger if you like
- Enjoy!
2.2.8
B0009HL7CY,B004TFDEPK,B000FJLXHU,B000UEYXK4


