| Easy Artisan Bread |
Recipe type: Bread
Author:
Ingredients
- 3 cups lukewarm water
- 1 1/2 Tbsp granulated yeast
- 2 Tbsp kosher salt
- 5 cups unbleached all purpose flour
- 1 1/2 cup white whole wheat flour
Instructions
- Use a 5 or 6 quart bowl or lidded container. Pour the water, and yeast and stir. Let mixture sit for ten minutes until foamy(this is how you know your yeast is alive and active). Add salt to foamy mixture, and stir. Measure and dump in the flour all at once. Stir in flour with a long wooden spoon, until all the flour is incorporated. The dough will be rough and wet.
- Put plastic wrap(I lightly spray my plastic wrap with olive oil, so the risen dough does not stick to it), or a lid on the container. If you are using a lid, do not snap shut. You want the gases from the yeast to escape. Let he dough sit at room temperature for 2 hours to rise. After 2 hours your dough will fill your container. Do not punch down the dough. The dough will be flat on the top and some of the bubbles may appear to be popping. the dough can be used right after the initial two hour rise, but it is much easier to handle when it is chilled. It is intended to be refrigerated and used over the next two weeks, although my dough never makes it that long. The flavor will deepen over that time, developing sourdough characteristics.
- The next day when you pull the dough out of the refrigerator, Wet your hands slightly. This will allow you to work more easily with the dough(if your dough breaks off instead of stretching, it is probably too dry, and you can add a few tablespoons of water and let it sit again until the dough absorbs the additional water. Scoop out one pound piece, or two half pound pieces and with slightly wet hands, and form into a tight ball(s). Cover an upside down cookie sheet with parchment paper, and place dough ball(s) on top of the parchment paper
- Let the dough rest for 40-90 minutes. The longer you let the dough rest, the more open hole structure your bread will have. Your dough balls will not rise much during this rest period, but will probably spread sideways, or not spread at all. This is normal.
- Preheat oven to 450 degrees with a baking stone, or sheet tray the center rack. Place a metal broiler pan or deep sheet tray, on the bottom oven rack(you will fill this with water for steam). Never use a glass vessel for this, because it might shatter. The broiler pan with water needs to be at least 4-5 inches away from your stone to prevent it from cracking. Sprinkle flour over the top of dough ball(s)
- Wet serrated knife or razor
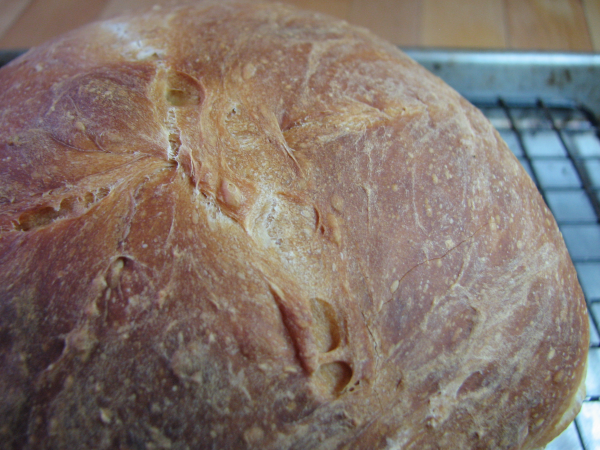
- Cut 1/4 inch slashes into the top of the loaf with a serrated knife or razor Gently and carefully slide the parchment paper with the loaf(s) on it into the oven onto the preheated stone, or upside down sheet tray. Add 2 cups of hot water to broiler pan or sheet tray. Bake the bread for 25 minutes, then delicately, and carefully remove bread from parchment paper and place bread back onto stone, upside down, to crisp up bottom crust. Bake for 10 more minutes, or until bottom is golden and crisp. Allow loaf to cool on a rack until it is room temperature.
- This artisan bread slices easily with nice uniform hole structure. It toasts up wonderfully for breakfast with butter and marmalade or homemade jam, is sensational for sandwiches at lunchtime and delicious drizzled with olive oil, alongside a hearty soup for your evening meal. Sometimes my girls and I can't wait til it cools completely and slice it and eat it with a lovely spread of butter and honey, <a title="Siracha Hummus" href="http://foodfilledlife.com/2012/06/27/siracha-hummus/" target="_blank" data-mce-href="http://foodfilledlife.com/2012/06/27/siracha-hummus/">hummus</a>, or fava bean dip.
Recipe by Food Filled Life at http://foodfilledlife.com/2012/07/02/easy-artisan-bread/